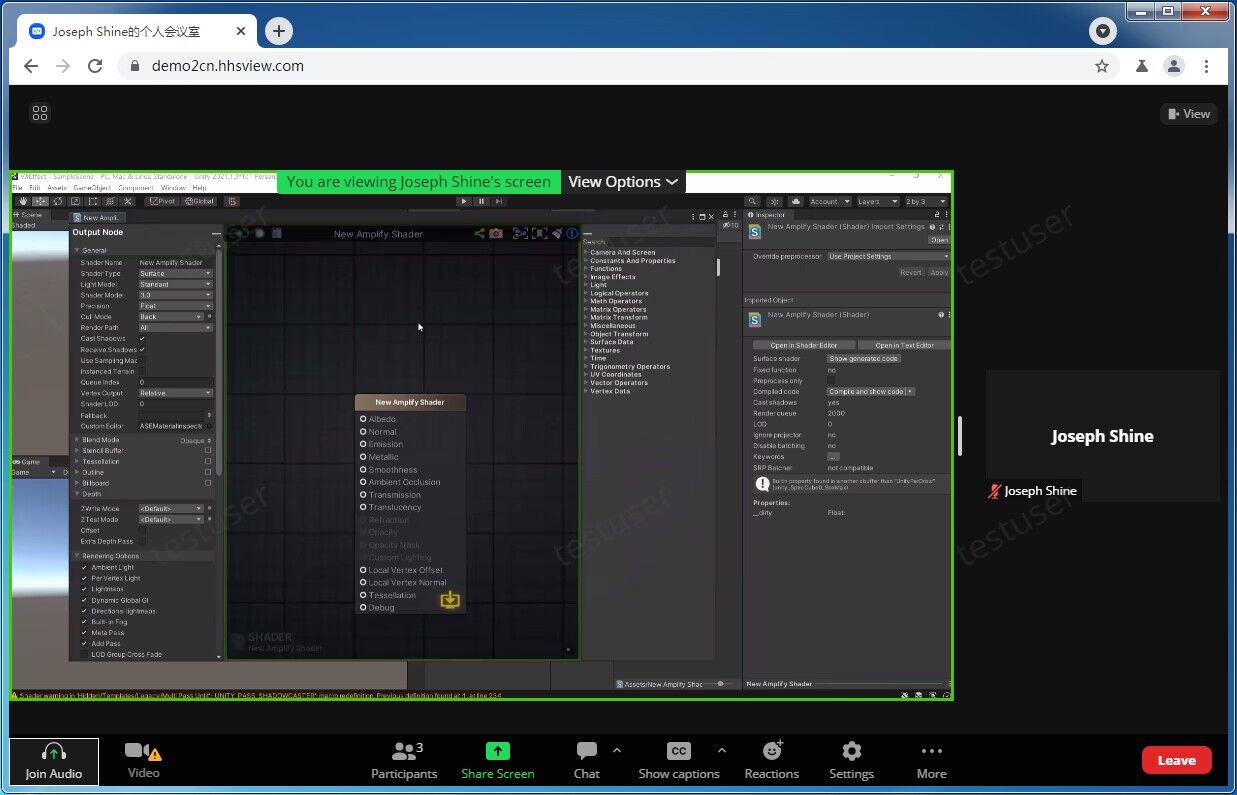
Protect Zoom Meeting by using DRM-X 4.0 HTML web page encryption technology to protect the Zoom Web SDK, it can effectively protect your Zoom meetings, prevent screen recording and screenshots. At the same time, DRM-X 4.0 supports watermarks to display user information and hardware binding functions. The combination of multiple protective measures comprehensively protects the security of your Zoom meeting. You only need to modify a few lines of code and encrypt a few files to complete this setup. Please follow our tutorial to complete the encryption of your Zoom meeting step by step.
This project is an HTML, CSS, JavaScript website that uses the Zoom Meeting SDK to start and join Zoom meetings and webinars. The code involved in this tutorial is all modified based on the Zoom Meeting SDK for Web. They include Meeting SDK JavaScript sample and Meeting SDK Auth Endpoint sample.
Tip: Meeting SDK Auth Endpoint needs to be run using NodeJS. Please install NodeJS on your server first.
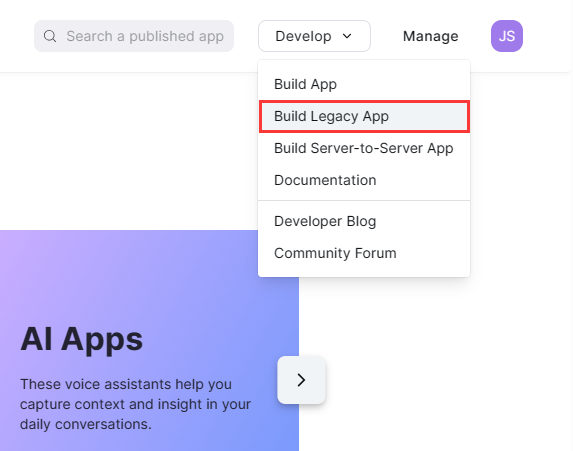
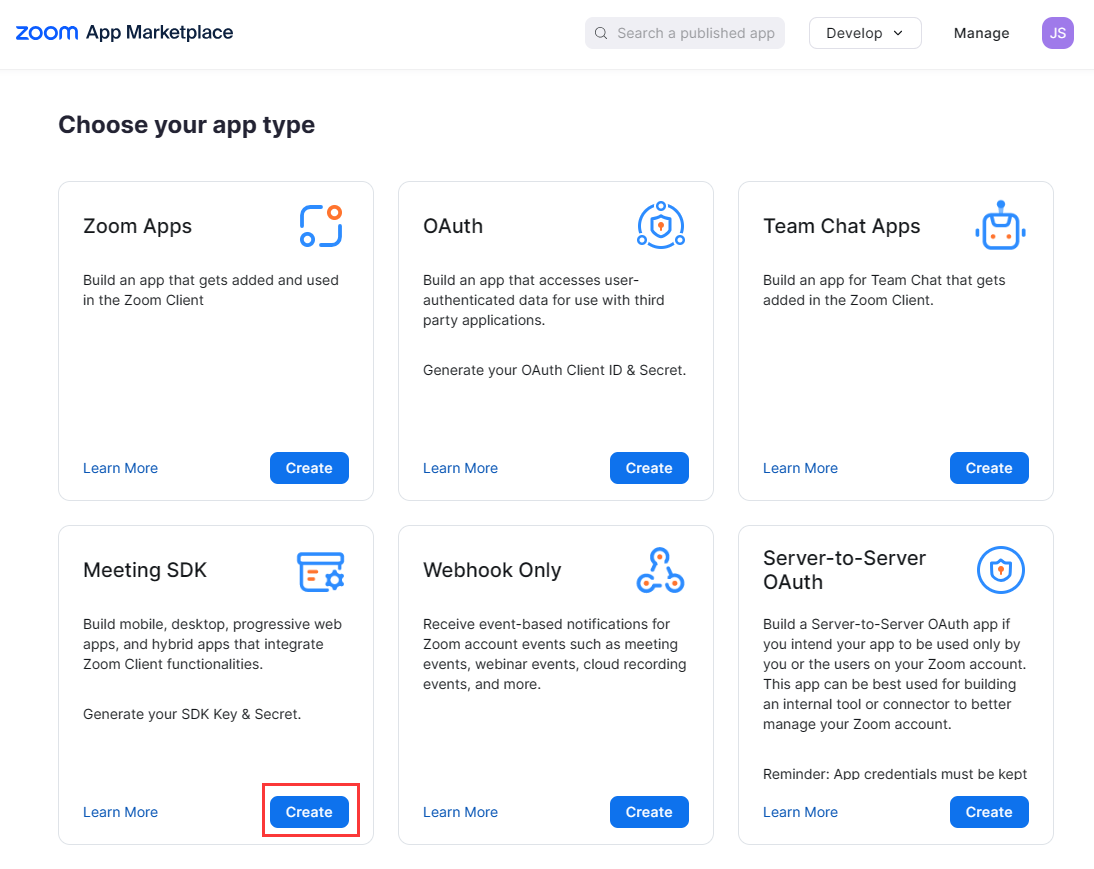
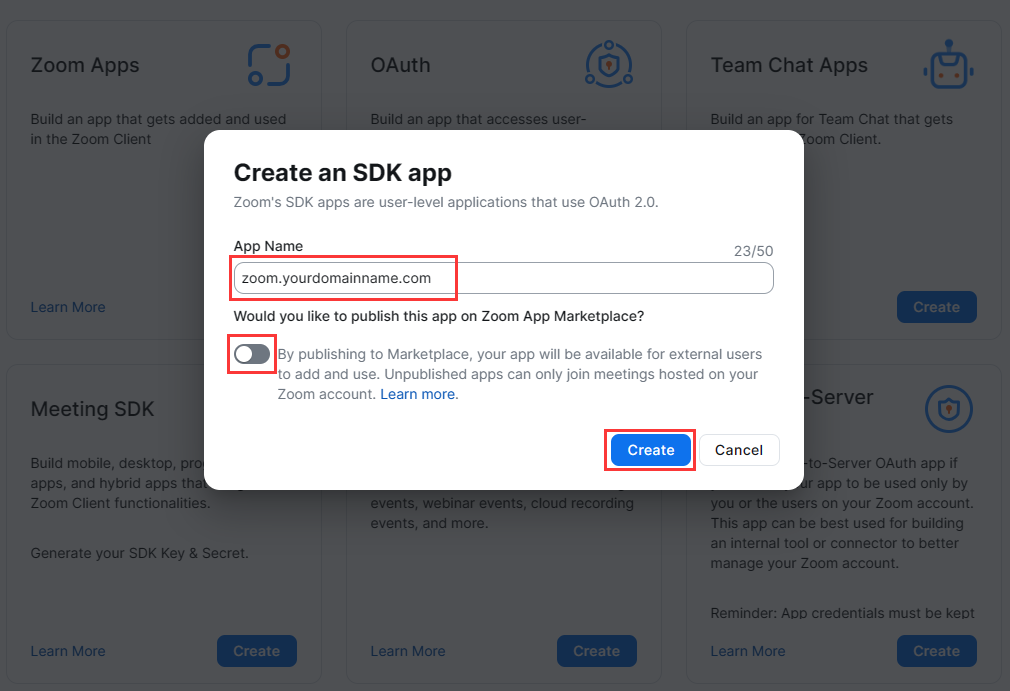
Create Zoom Meeting SDK:
First, you need to purchase a Zoom Pro version account, then log in to your Zoom account and visit: https://marketplace.zoom.us/
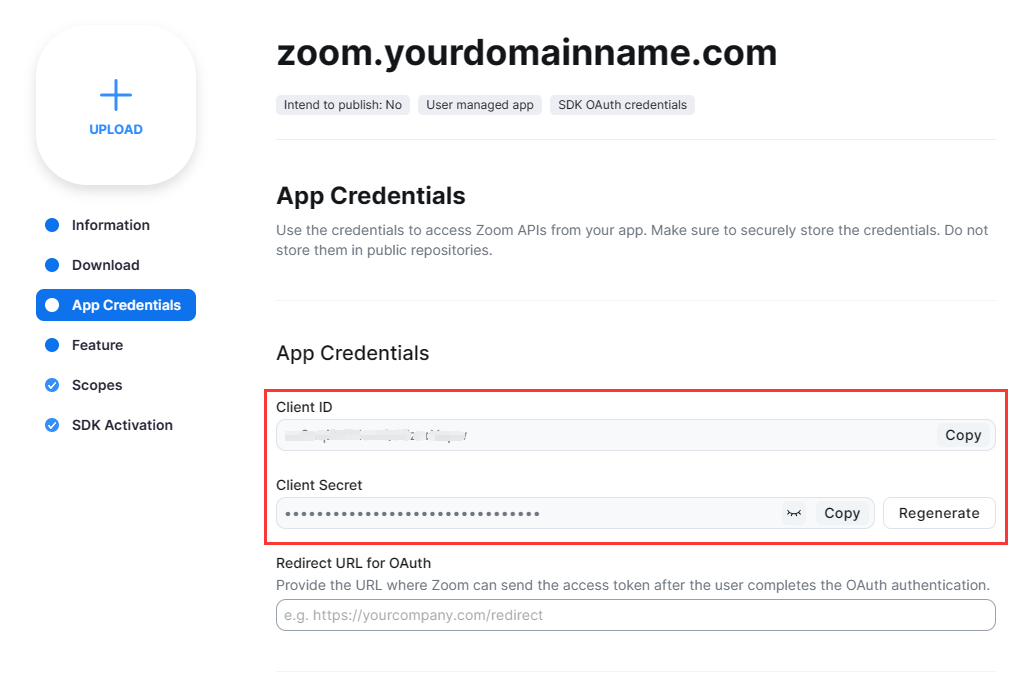
Configure App Credentials:
Access the Meeting SDK created earlier and click "Basic Information" to view the Client ID and Client Secret.
Upload the downloaded Zoom Meeting SDK for Web folder to your server. The file contains two subfolders, one is "meetingsdk-javascript", which is a website using HTML, CSS and JS. Users will access the file index.html in the folder to join the meeting. The other folder is "meetingsdk-auth-endpoint", which needs to be run using the NodeJS service, and "meetingsdk-javascript" needs to request "meetingsdk-auth-endpoint" to generate the Zoom Meeting SDK signature.
First configure "meetingsdk-auth-endpoint" (please make sure the server has NodeJS installed).
1. In terminal, cd into the "meetingsdk-auth-endpoint" folder.
cd meetingsdk-auth-endpoint2. Then install the dependencies:
npm install3. Edit the ".evn" file and set SDK parameters
vim .evnIt contains two parameters: ZOOM_MEETING_SDK_KEY and ZOOM_MEETING_SDK_SECRET, they correspond to the Client ID and Client Secret in App Credentials.
4. Save and close .env.
5. Start the server: (It is recommended to use the nohup command to run the service without hanging up)
nohup npm start &meetingsdk-auth-endpoint runs on port 4000 of the server. Please ensure that port 4000 is not occupied by other programs, or you can modify the port setting of index.js and change 4000 to the port number you want to set.
Note: To run this service using https protocol, you need to set up an SSL certificate. Please make sure that the "localhost.key" and "localhost.cer" files in the directory are the correct SSL certificates for your domain name server. (You can also modify the path to the SSL certificate file in index.js)
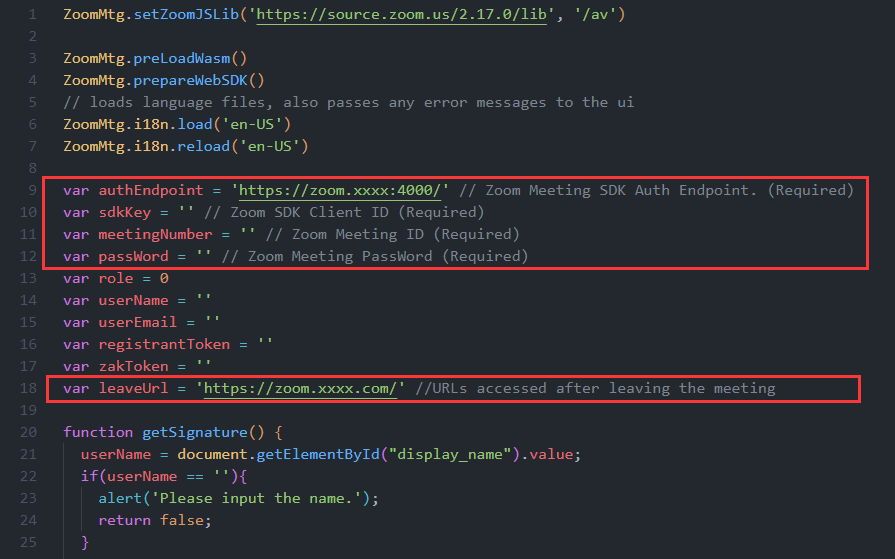
Then configure the meetingsdk-javascript/client-view.js file. Set the requested authEndpoint URL, which is the "meetingsdk-auth-endpoint" URL deployed earlier. Fill in the Client ID in Zoom App Credentials into the sdkkey parameter, and fill in the meeting ID and meeting password, as well as leaveUrl, as shown below:
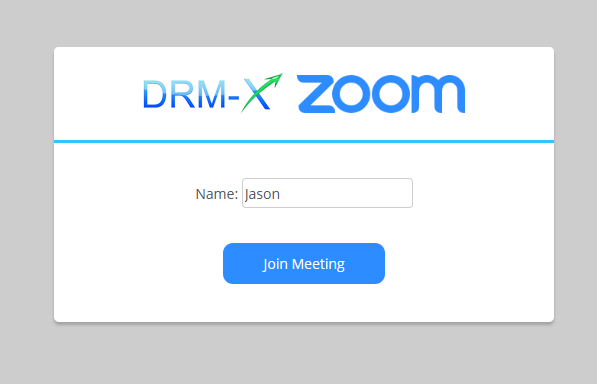
After completing the above steps, the authEndpoint service will run on the server to listen for requests. Then, open a browser to access the domain name access URL of the Zoom Meeting SDK for Web you set, enter the Name, and click Join Meeting to try to join the meeting. (The meeting host can use the official Zoom client to start the meeting.)
After completing the above steps, the authEndpoint service will run on the server to listen for requests. Then, open a browser to access the domain name access URL of the Zoom Meeting SDK for Web you set, enter the Name, and click Join Meeting to try to join the meeting. (The meeting host can use the official Zoom client to start the meeting.)
If you are unable to join the meeting, please check the parameters of the client-view.js file and the settings of the authEndpoint.
Register and log in to DRM-X 4.0 account:
Visit https://www.drm-x.com/Fees-Compare-4.0.aspx to register for a 90-day free trial account.
After successful registration, visit https://4.drm-x.com to login to the DRM-X 4.0 account.
Encrypt the Zoom Web SDK page:
After logging in to the DRM-X 4.0 account, click "Protect File" in the left menu, and complete the configuration before encryption step by step as required. In the Step 4. Protect Files Online, download the Xvast Packager (zip file), after the download is complete, unzip the downloaded zip file, and copy the two files inside to the Xvast installation directory. Then go back to the " Protect File" page and click the "Popup encrypt dialog" button.
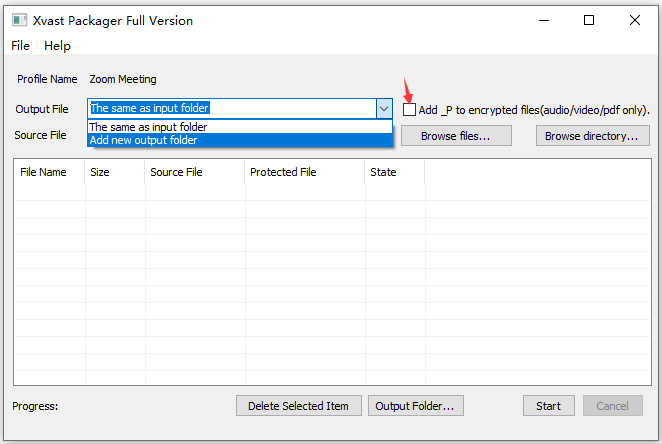
You will see the interface for encrypting files.
Step 1: Select "add new output folder" in the drop-down box of the output file, and select the folder of the encrypted web page.
Step 2: Cancel "add _P to encrypted files". As shown in the figure below:
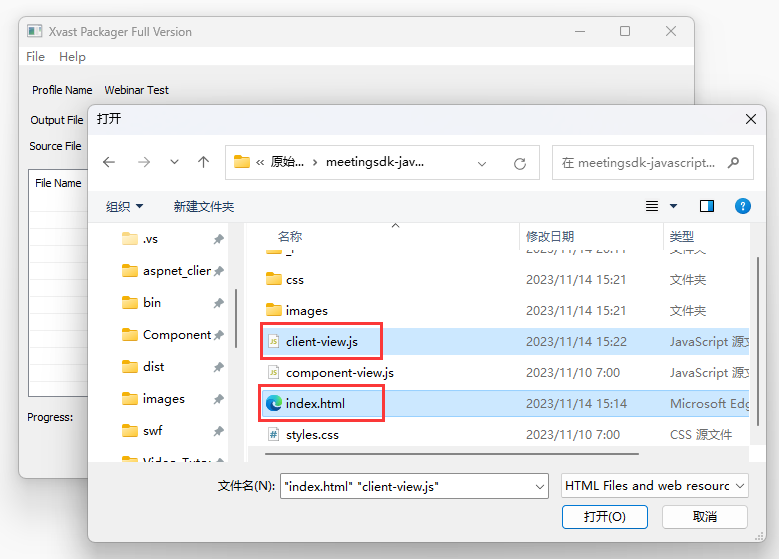
Step 3: Click "Browse files..." Button, and select "HTML files and web resources" in the lower right corner of the select file interface.
Step 4: We need to encrypt some pages of the web client SDK, which contains index.html and client-view.js.
Refer to the figure below:
Step 5: Click the "start" button in the encryption interface to encrypt the above two files.
After encryption, we need to replace the encrypted file. (please make sure to back up the source file before replacement!)
Access the encrypted Zoom Meeting SDK page:
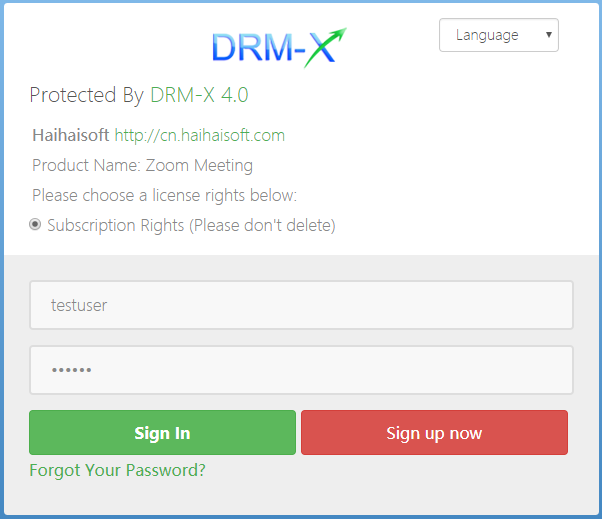
Finally, we use the Xvast browser to access the URL of the encrypted webpage. In the form to login to obtain a license, enter the end-user account and password created by DRM-X 4.0 to obtain the license. (Default username: testuser password: 123456).
After logging in and obtaining a license, you will be redirected to the meeting interface.
We recommend that the meeting host use the official Zoom client to start the meeting.
Encryption security instructions: DRM-X 4.0 only encrypts the web pages of the Zoom Meeting SDK, so users must use Xvast to access Zoom meetings. Therefore, it supports DRM-X 4.0 Prevent Screen Recording, watermarking and other functions. However, DRM-X 4.0 does not encrypt the video data transmitted by the video conference. The security of the video conference itself is the responsibility of Zoom. Please do not leak your conference ID and conference password.
Zoom Meeting SDK update instructions: Zoom officials will enforce the required minimum version restrictions on the SDK every quarter. SDKs with versions lower than shown will stop working in production environments, preventing customers from joining meetings. So please keep an eye out for updates to Zoom Meeting SDK for Web. We will also update the modified version of Meeting SDK from time to time. For more details, please visit:Meeting SDK - Minimum Version (zoom.us)
If you encounter any problems during the configuration process, please contact technical support.
QQ: 1279126286/994184623
Contact us on Microsoft Teams
E-mail: service#haihaisoft.com (replace # into @)


